Having wrapped up what Discussions and the latest E-commerce features have to offer to our users, let’s jump right into talking about the addition of Custom Backgrounds for Certificates, Google Fonts, and other small yet important feature tweaks we introduced recently.
Custom Backgrounds (Certifications)
The ability to easily customize Certificate backgrounds is one of the few aesthetic tweaks we made on our last big update. It is not a new feature per se, but you no longer need to play around with the CSS, and you can upload your background images straight to the website server.
Here is how it’s done:
1) To get into the Certification settings panel, you need to switch to the “Administrator” role, and navigate from the Home Page to the “Accounts & Settings” menu and then “Certifications”.
2) Within the Certifications settings panel, you will see the already existing Certificate Templates, as well as the newly introduced button for uploading your own background images, previewing your certificate etc.
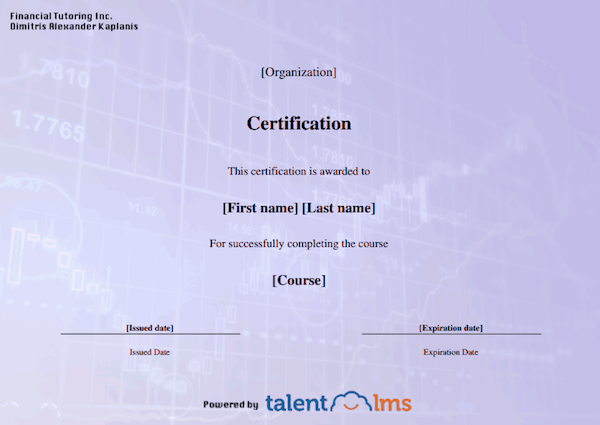
3) Once you have uploaded your own custom background, you can view it on that page, as well as preview how a certificate recipient will see it.
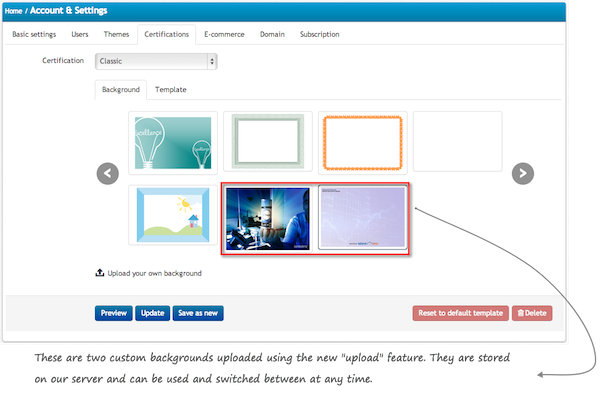
Note: You may upload any image size you wish, as our system will either upscale or downscale depending on the image’s size. Nevertheless, if you are designing an image to-fit perfectly, the ideal size is 840×595.
4) Once you have uploaded and selected your desired background image, you may Preview it before saving any changes. You may also print a certificate you preview using Google Docs.
Google fonts
To give an extra pinch of spice to your content, we decided to add more Font options. Keeping it minimal and stylish we selected a few fonts from the Google Fonts library, which you can select from when creating or editing content.

Different registration methods per branch
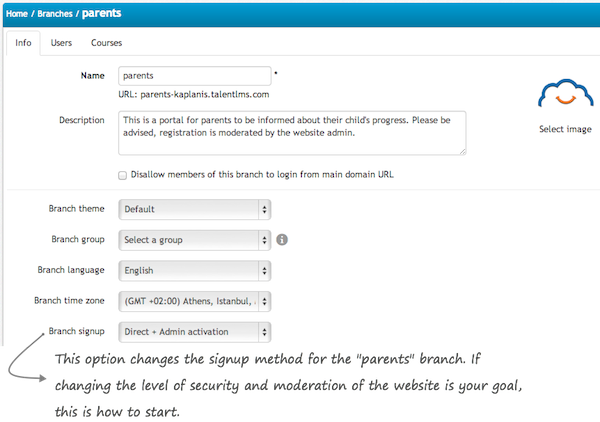
Branches is a feature used to allow completely different groups to exist within the same learning portal. In essence, since different branches of users can see different content and interact on completely separate Discussion forums, it’s only normal that we take it a step further and enable different sign-up methods to be allowed, too; this can prove useful depending on the level of monitoring the administrator wants to apply to each branch.
This is how it is done:
1) Switch to “Administrator” role, and navigate to the Home Page.
2) Click on “Branches”; if you already have branches created, simply click on the one you want to customize, and you will be presented with a variety of settings to modify.
3) Change the “Branch Signup” method from the dropdown menu to whichever of the 5 methods you prefer.
Grid mode for course catalog & social interactions
This is clearly a matter of preference, but preference implies a choice, and you have that. To reduce the clutter of too much information, we now offer every user with access to your course catalog to view courses in “Grid” mode. “Grid” mode looks like that: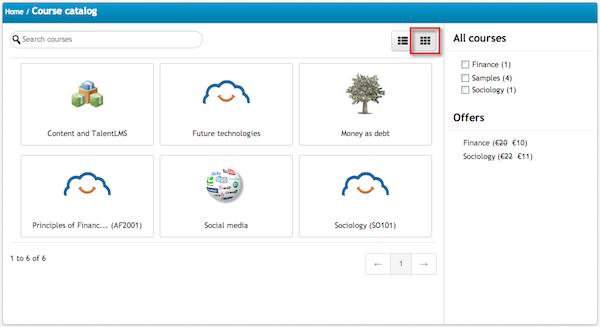
Social interactions
End users may now share (Facebook/Twitter) courses online easily through the Course Catalog. This feature needs to be enabled by the Administrator before users can share or tweet anything linking to the course catalog.
How this feature can be enabled:
Note: The external course catalog needs to be enabled; sharing is only allowed through the course catalog. To enable it, under “Account & Settings” and “Security”, tick “External course catalog”.
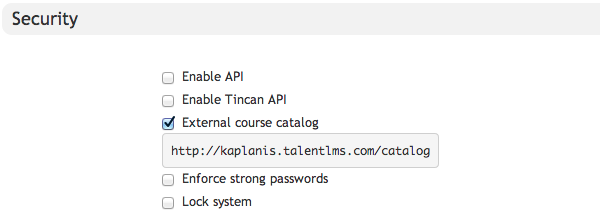
1) Switch to “Administrator” role, and navigate to the home page.
2) Under “Account & Settings”, on the bottom of the page and under “Social Media”, tick “Allow interactions with social media in course catalog”.

Manual Completion of a Course
Instructors may now manually complete a course for a user. This is particularly useful when a user experiences an issue and the intervention of an administrator is vital for the completion of the course.
How this is done:
1) Switch to “Instructor” role, and navigate to the home page, from which you can select the course you want to set as “complete” for a user.
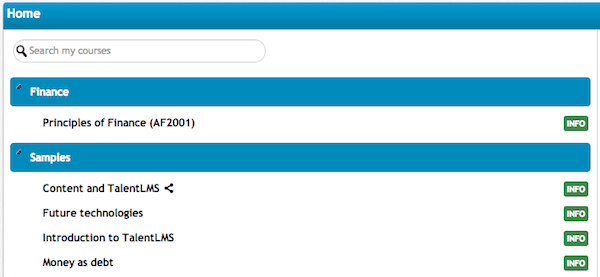
2) Select the Course, and on the right pane, click on “Users”.

3) Decide which user you want to make this change on, and click on the little “Pen” next to his/her name. This will bring up a window on which you can edit both the “Start” and “Completion” dates for this user.

Mobile and tablet device improvements
We have made some changes for your viewing pleasure on how TalentLMS is rendered on mobile and tablet devices. Purely aesthetic, we have made sure that glitches related to different resolutions and aspect ratios have been eradicated; this is a continuing effort, so if you come across something that doesn’t look “right” please let us know!
Please feel free to contact us with feedback on the new and old features, as well as ideas for features you would like to see featured in the future. Just click here!

