Attempting to cover all the integration options offered by TalentLMS is like playing a game of whack-a-mole. Just as soon as you’ve covered a few (like we did here, here and here), several more pop up in some new update release – just like Zopim does now.
Never ones to give up easily, in this post we’re gonna have a look at how you can integrate TalentLMS with Zopim.
Zopim, in case you didn’t know, is a popular Live Chat service created by Zendesk (the company behind the cloud-based customer service platform of the same name).
In other words, Zopim is a Javascript “widget” (programming speak for “a webpage control that you can visually interact with”), that lets you chat with your users.
Zendesk intends for Zopim to be primarily used for customer support, so their marketing copy (and help pages) go on about using Zopim to chat with “customers”. Don’t be confused by that – in TalentLMS you’ll be using it to communicate with your learners (which, depending on whether you offer paid courses or not, may or may not also be your customers).
Installing Zopim
So how should you go about integrating Zopim?
As is the case with most of TalentLMS’ integration options, it couldn’t be easier.
Zopim, is essentially a third-party Javascript, err, script, that TalentLMS needs to load along with its own scripts in order to enable the Chat service.
To add it into TalentLMS, you first need to get a code snippet from your Zopim account page. Confused? Don’t be. We’ll break the whole process down for you, step by step:
(1) Go to the Zopim website and log in to your Zopim account (if you don’t already have one, you’ll need to sign up first).
(2) After you’ve logged in to Zopim, you should be able to get the required snippet by visiting the “Widget” page (its entry appears somewhere near the bottom of the left sidebar).
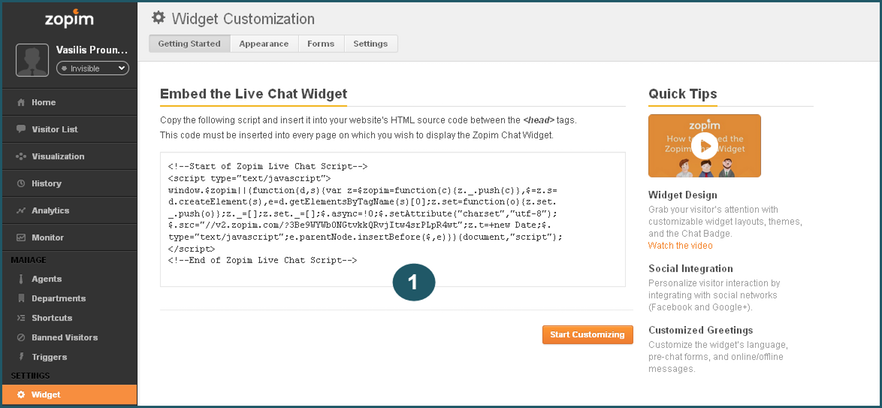
(3) Select it with the mouse and copy the script that you see at point 1 in the image above.
Copy that snippet to your clipboard (Control-C or Cmd-C on a Mac), and keep it there, as you’ll need to paste into TalentLMS in the next steps.
(4) Log in to your TalentLMS administrative account (you need to be an admin; instructor or student won’t do), and go the Themes tab of the Settings page.
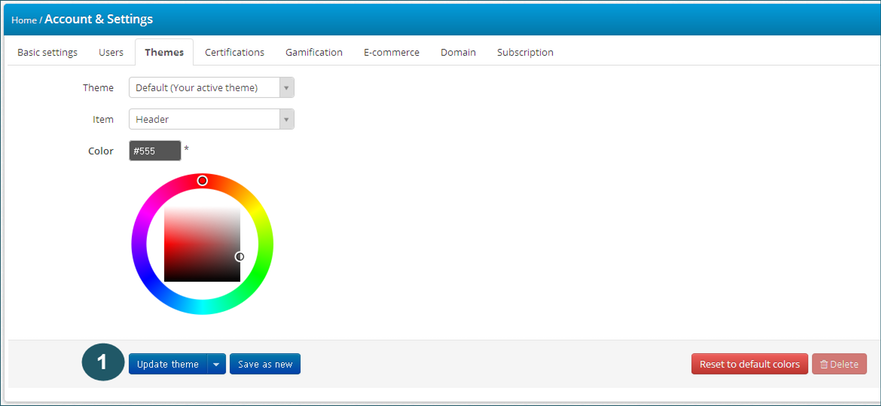
(5) On the “Update Theme” dropdown menu, click on the downward arrow at the right and select the “Additional Javascript” option.
(6) On the window that pops up, paste the code snipped you copied from Zopim in the third step and click save.
And that’s it.
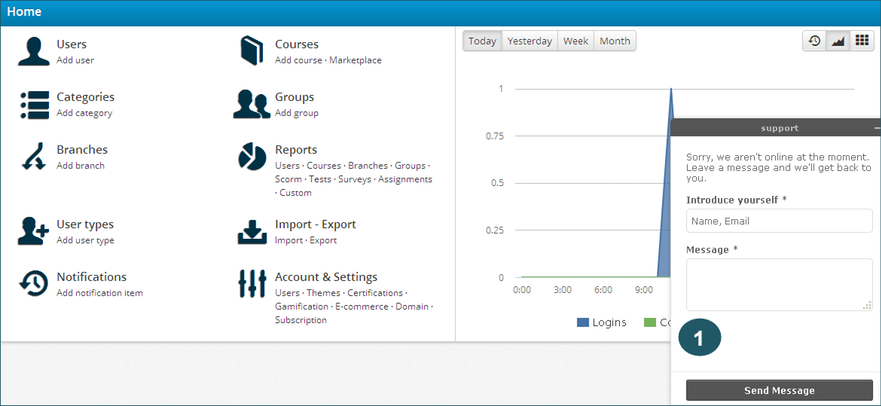
A chat window should now immediately appear in the right corner of your panel. If you don’t see it, do a full page reload (Control-R or Cmd-R on the Mac). If it’s still missing, check that you’ve copied correctly the code snippet as provided by Zopim and repeat the process.
Now you should be all set to start communicating with your learners using your fancy new Zopim chat from inside TalentLMS.
Conclusion
In this post we looked into how you can integrate Zendesk’s popular Zopim real-time chat service into TalentLMS. Such a service can be handy not just for offering customer support to your students, but also as part of your Instructor-Led Training sessions.
If you want to know more about TalentLMS and its numerous integration options, why don’t you simply sign up for free and take it for a drive?
| Tags: LMS Integration
